Adjustable Impedance In Tortuga Preamps
Adjustable Impedance
March 1, 2015 – Tortuga Audio has released a major firmware update that adds adjustable impedance it its LDR Passive Preamp product line. Adjustable impedance allows the user to change the input impedance of their LDR passive preamp. This firmware update also includes an upgraded auto-calibration algorithm resulting in improved sound stage and stereo imaging.
The Adjustable Impedance feature allows the user to set up 5 different impedance settings, each between 1k and 99k, with setting #1 currently set up at 20k by default.
All Tortuga Audio preamp products shipped starting January 1, 2015 include some version of the updated 2.1.x firmware. This firmware update is also available to all existing owners of the V2 and V2.1 versions of the LDR3x passive preamp controller board as well as all passive preamp products equipped with a USB socket. Version 2.1.7 is considered the most complete, stable and reliable version as of this edit. Owners are encourage to upgrade to this version.
The latest firmware file plus the required PC compatible bootloader program (not available yet for MACs) can be downloaded from here. Detailed instructions can be found there as well. The specific remote command sequences needed to adjust impedance can be found here in our online documentation.
How Adjustable Impedance Works
The Adjustable Impedance feature allows the user to set up 5 different impedance settings with setting #1 already set up at 20k by default. The impedance level is user adjustable at each of the five impedance settings. After adjusting impedance to a different desired level, the preamp must then be immediately turned off and run through an auto-calibration (“auto-cal”) cycle. It is only by running through auto-cal that a new impedance level will be fully established and available at a given impedance setting number. This process can be repeated for each of the 5 impedance settings. Once set up, impedance settings can be switched “on the fly” while listening to music. This allows the user to find the optimal setting for their system.
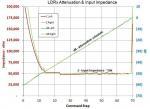
When the impedance level is changed and the unit is run through auto-cal, each LDR is run through a 70 step calibration process (280 total steps for 4 LDRs) with new target resistance levels corresponding to each step along the attenuation range. While the attenuation schedule itself does not change per se, the series/shunt resistance pairs at each dB level will be different while maintaining the targeted nominal impedance level.
Improved Auto-Calibration
In addition to Adjustable Impedance, Tortuga Audio has also upgraded the accuracy and reliability of its auto-cal feature which keeps the LDRs perfectly matched despite any performance drift or the normal effects of aging. Auto-calibration accuracy has been improved by almost an order of magnitude since the original release in 2014. This translates directly into improved sound stage and stereo imaging. As a result our preamps now sound even better!
Impedance Matching vs. Bridging
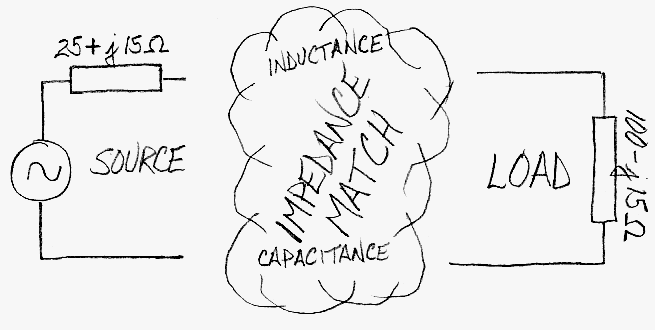
To better understand Adjustable Impedance it helps to have brief overview of impedance matching and bridging. I will spare you a detailed explanation of what impedance is other than to say it’s the effective resistance to the flow of current in the presence of dynamic voltage signals typical of audio.
The phrase “impedance matching” shows up quite a bit in the audio world. It’s both a highly technical subject but really comes down to some very basic concepts.
The Objective: To maximize the transfer of audio energy from the source device (your CD, DAC, phono stage etc. ) to the load device (your amp). Why? Because things usually sound better when this happens. And we all want better sound, right? Well, let’s pretend we all do. Read on.
The Problem: Maximum energy transfer can be done be matching the impedance of the load with the impedance of the source. Easy, right? Wrong! First of all every source and every load out there in audioland would have to agree on a standard impedance. Hasn’t happened. Not going to happen. Secondly…well, never mind, it’s just not practical, trust me on this.
The Solution: Fortunately, there is a practical solution. Just make the input impedance (dynamic resistance) of the load high enough and the output impedance of the source low enough such that the source doesn’t have to work very hard and the load doesn’t demand much. This is known as Impedance Bridging.
Most amps have an input impedance of 10k or higher. Most audio source devices have an output impedance level of less than 1k. The resulting 10:1 Impedance Bridging Ratio (the “Ratio”) has become a widely accepted guideline for ensuring good audio energy transfer. At 10:1 or higher not much current is required of the source to deliver the voltage/audio signal to the amp. Designers like this too because it makes their job easier and reduces cost. And it sounds good. Everyone’s happy.
Impedance Bridging With Passive Preamps
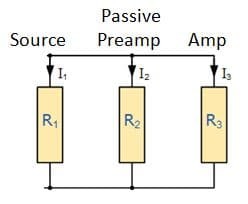 Well, maybe not everyone. When a passive preamplifier is placed between an audio source and an amplifier, the source now “sees” not only the amp’s impedance (R3), but the combined impedance of the Passive Preamp (R2) plus the amp, let’s call that Rt. It’s an unfortunate consequence of physics and math that the combined effective impedance of R2 and R3 is always lower than either alone.
I will spare you the first principles math derivation but the bottom line equation is Rt = (R2 x R3)/(R2 + R3) where Rt is the total combined impedance of the preamp and amp.
Example 1:
Let’s say we put a 20k passive preamp in front of that 10k amp. The result is Rt = 6.7k. If our source has a 1k output impedance we are now at a Ratio of 6.7:1, well below our 10:1 or higher guideline. Will this yield good results? Maybe. Depends on how robust the output stage is of the source.
Example 2:
Ok, let’s raise the impedance of the preamp all the way to 100k. The result is 9.1k. Better and not exactly 10k but probably ok.
Example 3:
Alternatively, get a new amp with say 50k input impedance and set the preamp back to 20k. The result is Rt=14.3. Better yet.
Example 4:
Instead, let’s get a source with an output impedance of 100 ohms. Using our example #1 of 10k amp and 20k preamp with Rt=6.7k we get a Ratio = 6700/100 or 67:1. Now we’re talking!
Why don’t designers simply raise the impedance of both the preamp and amp to say 100k or higher and be done with it? Because everything comes with a price and high input impedance usually (but not always) comes at the cost of higher distortion.
What impedance level is ideal for your system? Hard to tell. The above guidance notwithstanding, impedance is more complex and nuanced then represented here. At least now you have the option to determine what works best for your system.
Readers who are interested in learning more about passive preamps may find the following article to be helpful: “Is A Passive Preamplifier Right For You?”




[…] LDR Passive Preamplifiers with Adjustable Impedance […]