V2 Bootloader/Software Upgrade Notice
What Is This Notice About?
Since initial release of the ldr3x.V2 board we’ve been actively evaluating how auto-calibration is set up on the V2 board with the help of feedback from our V2 customers and even input from prospective customers. As a result of this work, we are making some changes to auto-calibration. Also, we are making changes to the bootloader firmware to correct some problems during the 5 second power-up boot process. These changes cannot all be accomplished through software updates alone but requires that the microcontroller chip on the V2 board be replaced. Over the next 2 weeks we will be shipping out the replacement chips to V2 owners. Each chip will contain both an updated Rev 2 bootloader plus our most up to date software build. We ask that you replace your existing chip with this new chip and, if possible, mail us back the old chip via regular post. The rest of this notice discusses all of this in more detail.
What/Who Does This Apply To?
This notice applies to all LDR3x.V2 owners to whom we shipped V2 units prior to July 2, 2014.
About The Bootloader
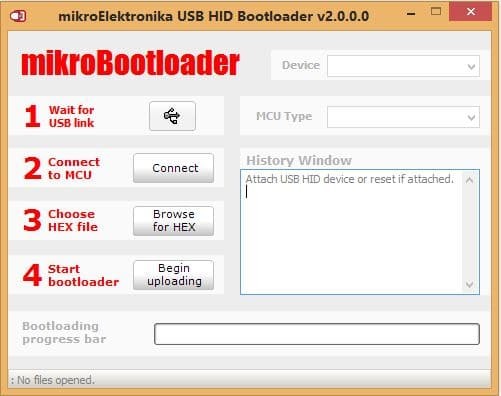
To understand why you need a new chip and not just a software update, a brief tutorial is needed on the software used in the V2. The V2 has 2 separate pieces of software – a bootloader and the main V2 app. The sole purpose of the bootloader is to allow software updates to the main V2 app via the USB port. Each time external power is applied to the V2 board, the bootloader runs for 5 seconds. If it doesn’t make a valid USB connection within those 5 seconds, it gives up and hands over control of the V2 to the main V2 app. To be clear, the bootloader only runs upon power being connected to the V2, not when then V2 is turned on or off. Unfortunately, only the main V2 app can be updated via the USB port. To change the bootloader requires that the existing microcontroller chip be replaced with a new chip with updated bootloader code.
Problem With The Bootloader
As it turns out, we made no provisions within the bootloader code for controlling the V2 during the boot period other than handling software updates via the USB port. In hindsight, that was a mistake. The Rev 1 (original) bootloader in your V2 board left the V2 board in an uncontrolled state during the 5 second boot period. This means there isn’t effective volume control during this 5 second boot period. If your amp happens to be on and and you had music playing through the unit during this boot-up period, the results could be unpredictable in terms of volume level. Also, several control signals were left floating and undefined during this boot-up period, including, most critically, the on/off state of auto calibration. We have concluded that this is unacceptable and thus we are taking steps to replace the bootloader for each of our V2 customers affected by this.
Changes To The Bootloader
Rev 2 of the bootloader corrects all of the above problems. With Rev 2, the instant the V2 is powered up, it now boots up in a controlled state with everything turned off including auto calibration and with the volume level set to minimum output (muted) levels. Even if your amp is on and music is playing as the V2 boots up, it shouldn’t allow for any output. In this respect the V2 is now behaving similar to our V1 design which didn’t have a bootloader. However, to make these changes requires replacement of the existing microcontroller chip in your V2. This is a very simple process you can easily do yourself.
Problem With Auto Calibration
The original idea of was to have auto calibration run continuously anytime the V2 was turned off but still connected to power. While total overkill in terms of necessity, the thought behind this was basically… “who cares if AutoCal runs all the time when the V2 is off as long as it doesn’t cause problems”. When AutoCal becomes active, the V2 disconnects both the audio input and output. We’ve determined that this may cause certain amps to hum (the Job 225 for example) while also possibly causing momentary noise on the audio output if the users amp is still on. While there are certainly procedural work-arounds to avoid this (as in always turn your amp off first before turning off the V2) we concluded that this was totally unsatisfactory and had to be resolved. As a side note, to date we’ve had no reported problems with auto calibration in terms of the AutoCal properly calibrating the LDRs.
Changes To Auto Calibration
With the release of Rev 1.1.0 of the uploadable V2 software, we have made the following changes to how auto calibration is run:
- AutoCal now runs only when manually initiated by the user while the V2 is turned off but still connected to power. We do recommend that the V2 be powered but turned off when not in use.
- AutoCal is started by pressing the Enter/Center button on the remote which disconnects the V2 from the audio input and output.
- Once AutoCal is initiated, it runs through one full cycle of LDR calibration in the following LDR sequence: right-series, right-shunt, left-series, left-shunt.
- Upon completing a full cycle, AutoCal shuts off and the V2 is reconnected to the audio input and output.
- While AutoCal is running it can be shut off prior to completing a full calibration cycle by pressing the Enter/Center button again on the remote. The V2 may not react immediately to this AutoCal shut down command and it may have to be repeated. We recommend you not interrupt the V2 during a calibration cycle once initiated. A full calibration cycle typically takes around 10 minutes.
- While AutoCal is running, you can cause AutoCal to interrupt calibration on the current LDR and switch to the next LDR in the cycle by pressing the Right button on the remote. If you switch through all 4 LDRs then AutoCal will shut down thinking its completed a full calibration cycle. This feature is provided as a diagnostic tool only. We highly recommend that you not interrupt AutoCal while its running.
- While AutoCal is running, the V2 will display each volume step (1-70) in the process for each LDR. Thus it will go through 70 calibration steps four times in a row over the course of a full calibration cycle. When AutoCal is complete or shut down deliberately, the display will also shut off.
- We recommend you turn your amp off before initiating an AutoCal cycle. Physically disconnecting your cables from the V2 isn’t necessary.
- We recommend you run AutoCal monthly but this is simply a recommendation and not a requirement.
Pairing Your Remote to the V2 After Replacing The Chip
Replacing the chip will very likely require you to pair your Apple Remote (or legacy Tortuga remote if you have one) before the V2 will recognize your remote. We’ve made numerous changes to the software such that you can now change the ID of the Apple Remote (by pressing/holding the Menu & Center button for 5+ seconds) if it conflicts with other devices you control with other Apple Remotes. However, after changing the ID, you have to teach the V2 the new ID code. This is done by first turning the V2 on by momentarily pressing in the Encoder button (or connecting J2-ES to ground). Then press and hold the Encoder button (or connect J2-ES to ground) for 20+ seconds and release. The puts the V2 into remote pairing mode. The Status LED and DM1 display will blink rapidly. At that point press any key on the remote (other than the Enter/Center key) to lock in the new ID code into the V2’s permanent memory. That’s it. Done.
Can I Use My V2 Board As Is With The Existing Rev 1 Bootloader?
Absolutely. However, we recommend that your amp be turned off before turning the V2 on or off and before applying power to the V2.
If your have any questions on this topic don’t hesitate to contact us at info@tortugaaudio.com or call 312.339.1757.


